

Most people think a water tank is a “drop it onq the roof and forget it” job. Then, six months later, they’re chasing a slow leak down the parapet wall, wondering why the tap on the ground floor barely dribbles.
I’ve spent two decades around plumbing lines, terrace slabs, and unhappy homeowners, and I can tell you the tank itself is rarely the problem. What fails is the base, the pipe alignment, or one badly chosen fitting worth ₹80. A water tank installation done right lasts fifteen to twenty years without drama. Done casually, it starts complaining in the first monsoon.
This guide walks through the full process -picking the tank, preparing the base, making every water tank connection correctly, and testing before you call it done.
How Do You Install a Water Tank?
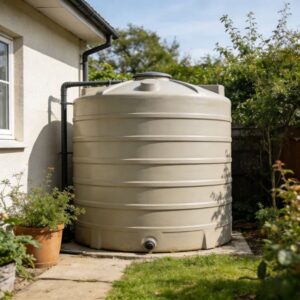
To install a water tank, choose a flat, load-bearing location near your plumbing line, build a level base of concrete or compacted gravel slightly wider than the tank, position the tank centrally, then fit the inlet, outlet, overflow, and drain connections using tank connector fittings with rubber washers. Add an air vent, install a pump if gravity pressure is inadequate, fill the tank halfway, and check every joint for leaks before full commissioning.
Realistically, a domestic overhead tank takes 3–5 hours. An underground sump or a 5000-litre unit needs a full day and extra hands.
Read More – 7 Signs That Your Water Tank Needs to Be Replaced
Before Anything Else: Three Decisions That Shape the Whole Job
Skip these and you’ll be redoing work later.
1. Where the tank actually sits. Overhead (terrace), ground-level (on a stand or plinth), or underground (sump). Each changes your pressure math, your pipe routing, and your budget.
2. How much water you genuinely need. Not what the neighbour bought. Indian standard planning works out to roughly 135 litres per person per day for a home with regular plumbing.
3. What your slab can carry. A 1000-litre tank weighs about 1000 kg when full -plus the tank’s own weight. That load has to sit over a beam or a supported section of slab, never in the middle of an unsupported span. If your building is older than 25 years or you’re unsure, get a structural engineer to look. This is the one step where guessing is genuinely dangerous.
Tank Capacity at a Glance
| Household size | Daily need (approx.) | Recommended tank | Typical setup |
| 2–3 people | 400 litres | 500 L | Single overhead tank |
| 4–5 people | 675 litres | 1000 L | Overhead tank, standard flats |
| 6–8 people | 1000 litres | 1500–2000 L | Overhead + small sump |
| Joint family / duplex | 1500+ litres | 2000–3000 L | Sump + overhead combination |
| Small apartment block | 3000+ litres | 5000 L | Underground sump + pump + overhead |
A useful rule from the field: buy one size up from your calculation. Water supply timings change, families grow, and an oversized tank costs a few thousand rupees more once. An undersized one costs you every summer.
Choosing the Right Tank Material
| Material | Strengths | Watch out for | Best suited to |
| Polyethylene (plastic) | Light, rust-proof, affordable, easy to install | Needs UV stabilisation; cheap grades go brittle | Homes, terraces, most residential use |
| Concrete (cast/RCC) | Very long life, excellent thermal stability | Hairline cracks over time; needs sealing; heavy | Underground sumps, large storage |
| Fibreglass (FRP) | Strong, corrosion-free, lighter than concrete | Higher cost; surface can craze | Industrial, chemical-adjacent use |
| Stainless / galvanised steel | High strength, hygienic, long service | Expensive; galvanised can corrode at welds | Commercial buildings, hotels |
For domestic use, a triple- or multi-layer food-grade polyethylene tank with a black inner layer (it blocks light and stops algae) covers 90% of situations. Check for ISI marking under IS 12701 -that’s the standard governing rotationally moulded polyethylene water storage tanks in India. If the tank has no marking, walk away.
Tools and Water Tank Fittings You’ll Need
Gather everything before you start. Half the delays on site come from one missing washer.
| Category | Items |
| Tank fittings | Tank connectors (inlet, outlet, overflow, drain), rubber/EPDM washers, ball valve or float valve, gate or ball valves for isolation |
| Pipes and joints | CPVC or UPVC pipe, elbows, tees, unions, reducers, pipe clamps |
| Sealing | PTFE (Teflon) tape, solvent cement, thread sealant |
| Tools | Hole saw or holesaw kit, spirit level, adjustable spanner, hacksaw, measuring tape, drill, deburring tool |
| Base materials | Cement, sand, gravel, or a prefabricated tank stand |
| Safety | Gloves, safety glasses, non-slip footwear, harness for terrace work |
A note on water tank fittings that trips up first-timers: buy the connector size that matches your pipe, not your tank hole. The hole gets cut to suit the fitting -not the other way around.
How to Install a Water Tank: Step by Step
Step 1 -Pick and Prepare the Location
The spot needs to be flat, accessible, and structurally sound. Leave at least 45–60 cm of clearance on all sides so you can reach fittings for cleaning and repair later. I’ve seen tanks wedged so tightly into a corner that servicing the outlet meant draining the whole thing and dragging it out.
Keep the tank away from overhanging trees (leaf litter and bird droppings around the lid) and, for underground sumps, at least 15 metres from septic tanks or soak pits.
Step 2 -Build a Level, Full-Contact Base
This is the step that separates a fifteen-year installation from a two-year one.
Polyethylene tanks need continuous, uniform support across the entire base. They’re flexible by design -put one on four widely-spaced bricks and the floor will sag between the supports, stressing the walls until it splits.
Your options:
- Concrete plinth -100–150 mm thick, extending 50–75 mm beyond the tank footprint on every side. The gold standard.
- Compacted gravel bed -100 mm of well-compacted 20 mm aggregate, screeded flat. Fine for ground-level tanks.
- MS or RCC tank stand -use only stands designed for your tank’s capacity, with closely-spaced supports and a solid platform on top.
Check the base with a spirit level in at least four directions. A tilt of even 10 mm across a 1000-litre tank means the outlet draws air before the tank is truly empty, and one wall carries more load than it should.
Step 3 -Position the Tank
Lift, don’t drag. Dragging a polyethylene tank across a rough slab abrades the base and creates weak points you won’t see until they weep.
Small tanks (500–1000 L) are a two-person job. Anything above 2000 L, especially onto a terrace, needs a crane or a properly rigged pulley setup. Centre the tank on the base, then check the level again -tanks shift during placement more often than you’d expect.
Orient the tank so the outlet faces your plumbing run. Rotating it after the connections are made is not an option.
Step 4 -Make the Water Tank Connections
Here’s where precision pays off. A standard domestic tank needs five openings:
| Connection | Position on tank | Typical size | Function |
| Inlet | Top | 20–25 mm | Brings water in from supply, pump, or rainwater line |
| Outlet | Side wall, 50–75 mm above the floor | 25–32 mm | Feeds your household distribution |
| Overflow | Side wall, 75–100 mm below the top | Equal to or larger than inlet | Carries excess water away safely |
| Drain / washout | Lowest point of side wall | 25 mm | Empties tank for cleaning and flushes sediment |
| Air vent | Lid or top | 20 mm, screened | Prevents vacuum and pressure build-up |
Why the outlet sits above the floor: sediment settles. Keeping the outlet 50–75 mm up means silt stays at the bottom instead of travel to your taps, and it flushes out through the drain when you clean.
Why the overflow must be at least as large as the inlet: if water can enter faster than it can leave, it will find its own exit -usually through the lid, down the outside of the tank, and into the wall you just painted.
Making the actual water tank connection:
- Mark the hole centre with a marker, measuring twice from a fixed edge.
- Cut with a hole saw at low speed, keeping the drill perpendicular to the wall. Angled holes never seal properly.
- Deburr both sides of the cut -plastic shavings under a washer cause slow, maddening leaks.
- Place the rubber washer on the inside of the tank, against the tank wall, with the threaded body passing outward.
- Hand-tighten the backnut on the outside, then bring it up with a spanner just past hand-tight. Overtightening deforms the tank wall and cracks the fitting boss -this is the single most common failure I see.
- Apply PTFE tape to the male threads (4–5 wraps, in the direction of tightening) before connecting pipework.
- Fit an isolation valve on the outlet close to the tank. When something needs fixing at 11 p.m., you’ll be grateful.
Route the overflow pipe with a continuous downward fall to a drain, a soak pit, or a secondary storage tank. Never let it discharge onto the roof surface or against the building’s foundation. Fit a mosquito-proof mesh on the open end -under vector control norms, an open overflow is a breeding site, and in many municipalities it’s also a compliance issue.
Step 5 -Install the Inlet Control
A float valve (ball cock) shuts off flow automatically once the tank is full. Set the float so it closes about 75 mm below the overflow level. That gap is your safety margin.
For pump-fed systems, a float switch or automatic water level controller does the same job electrically and saves both water and pump life. It costs ₹1,500–4,000 and pays for itself in avoided burnout.
Step 6 -Set Up the Pump
Gravity gives you roughly 0.1 bar of pressure per metre of height. A tank sitting 3 metres above your shower delivers about 0.3 bar -enough to fill a bucket, not enough for a decent shower or most instant geysers.
If you need more, a pressure booster pump on the outlet side solves it. Size it to your actual demand, not the largest one on the shelf; an oversized pump short-cycles and wears out fast. Add a non-return valve and a strainer, and mount the pump on a vibration pad -the hum travels through concrete surprisingly well.
For underground sumps, you’ll need a separate transfer pump moving water from sump to overhead tank, ideally with a level controller at both ends.
Step 7 -Test Before You Trust
Fill the tank to about one-third. Wait thirty minutes. Walk every joint with a dry tissue -tissue finds seepage your eyes miss.
Then fill to full and check again, this time including the overflow behaviour. Deliberately let the tank reach overflow level once and confirm the water goes exactly where you intended.
Finally, open every tap in the house in sequence and check flow and pressure. Note anything sluggish now, while your tools are still out.
Step 8 -Secure and Finish
Fit the lid tightly. In high-wind areas, strap the tank to the base or stand -empty polyethylene tanks are surprisingly good at becoming airborne. Insulate exposed pipework if you’re in a region with cold winters or intense summer sun. Label the isolation valves. It takes two minutes and saves the next person an hour.
Keeping It Working: Maintenance Basics
| Task | Frequency |
| Visual leak and lid check | Monthly |
| Full drain, scrub, and disinfect | Every 6 months |
| Overflow mesh cleaning | Every 3 months |
| Fitting and washer inspection | Annually |
| Float valve / level controller check | Annually |
| Pump servicing | Annually |
Cleaning is simple: drain fully, scrub the interior with a soft brush and mild chlorine solution, rinse thoroughly, and refill. Never use metal scrapers or harsh acids on polyethylene -you’ll scratch the surface and give bacteria somewhere to hide.
Conclusion
A water tank installation is only as good as its weakest element -and that element is almost never the tank. It’s the base that wasn’t quite level, the connector that was tightened one turn too far, or the overflow pipe that was one size too small.
Take the extra hour on the base. Buy proper water tank fittings rather than the cheapest on the counter. Test at one-third full before you test at full. Do those three things and your tank will quietly do its job for the next fifteen years, which is exactly what you want from it.
And whichever tank you choose, check for the ISI mark and food-grade certification before it leaves the shop. That single detail affects the quality of every glass of water your household drinks.
Frequently Asked Questions
What is a tank connector fitting called?
A tank connector fitting is most commonly called a tank connector or tank adaptor. You’ll also hear it referred to as a bulkhead fitting, tank nipple, or tank union depending on the region and supplier.
It consists of a threaded body that passes through the tank wall, a backnut that tightens against the outside, and a rubber or EPDM washer that seals against the inside surface. The threaded end then accepts standard pipework via an adaptor. In domestic plumbing catalogues in India, “tank nipple” and “tank connector” are used more or less interchangeably.
How to water tank fitting?
To fit a water tank connection: mark and cut a clean, perpendicular hole using a hole saw sized to the connector body. Deburr both edges. Place the rubber washer on the inside face of the tank, push the connector body through from inside to outside, and thread the backnut on from the outside. Tighten by hand, then give it a small additional turn with a spanner -no more. Apply PTFE tape to the exposed male thread and connect your pipe.
The two rules that matter most: the washer always sits inside the tank, and you stop tightening as soon as it’s snug. Fittings crack far more often from over-torque than from under-torque.
What is a tank connector?
A tank connector is a plumbing fitting designed to create a watertight seal where a pipe passes through the wall of a water tank. Because a tank wall is a flat, relatively thin surface, you can’t simply thread a pipe into it -the connector spreads the sealing load across a washer and a flange, holding pressure without stressing the plastic.
Tank connectors come in polypropylene, brass, and CPVC. They’re sized by the pipe thread they accept -15 mm (½”), 20 mm (¾”), 25 mm (1″), and upward. Every functional opening on your tank -inlet, outlet, overflow, drain -uses one.
Is it safe to drink water from a plastic tank?
Yes -provided the tank is food-grade, BPA-free, UV-stabilised, and ISI-certified. Quality polyethylene doesn’t leach into stored water at normal temperatures, and a black inner layer prevents the light penetration that lets algae grow. What matters just as much is maintenance: any tank, in any material, becomes unsafe if it isn’t cleaned twice a year and kept properly covered.
How long does a water tank installation take?
A straightforward overhead tank swap on a prepared base takes 3–5 hours. A new installation requiring base construction and fresh pipework typically runs a full day. Underground sumps involve excavation and curing time, so plan for several days.
Can I install a water tank myself?
Positioning a small tank, making the connections, and testing are well within the reach of a competent DIYer. Three things aren’t: assessing whether your slab can carry the load, lifting large tanks to height, and electrical work for pumps. Bring in a professional for those.